A bicycle is something nosotros are all pretty familiar with, just information technology can sometimes be taken for granted.
It is a design that is really intricate and deliberate, and information technology allows for more efficient transportation, fun rides and even loftier octane tricks.
In that location are bicycles for pretty much every need and skill level, and information technology tin can be a lot of fun to master one! Sometimes riding one isn't feasible, and learning how to describe a cycle tin can be the next best thing.
This tin be quite challenging thanks to that complex design nosotros mentioned earlier, only that'south what this tutorial is here for.
One time you accept completed this pace-by-step guide on how to depict a bicycle in 6 steps, drawing i will be as easy as riding a wheel!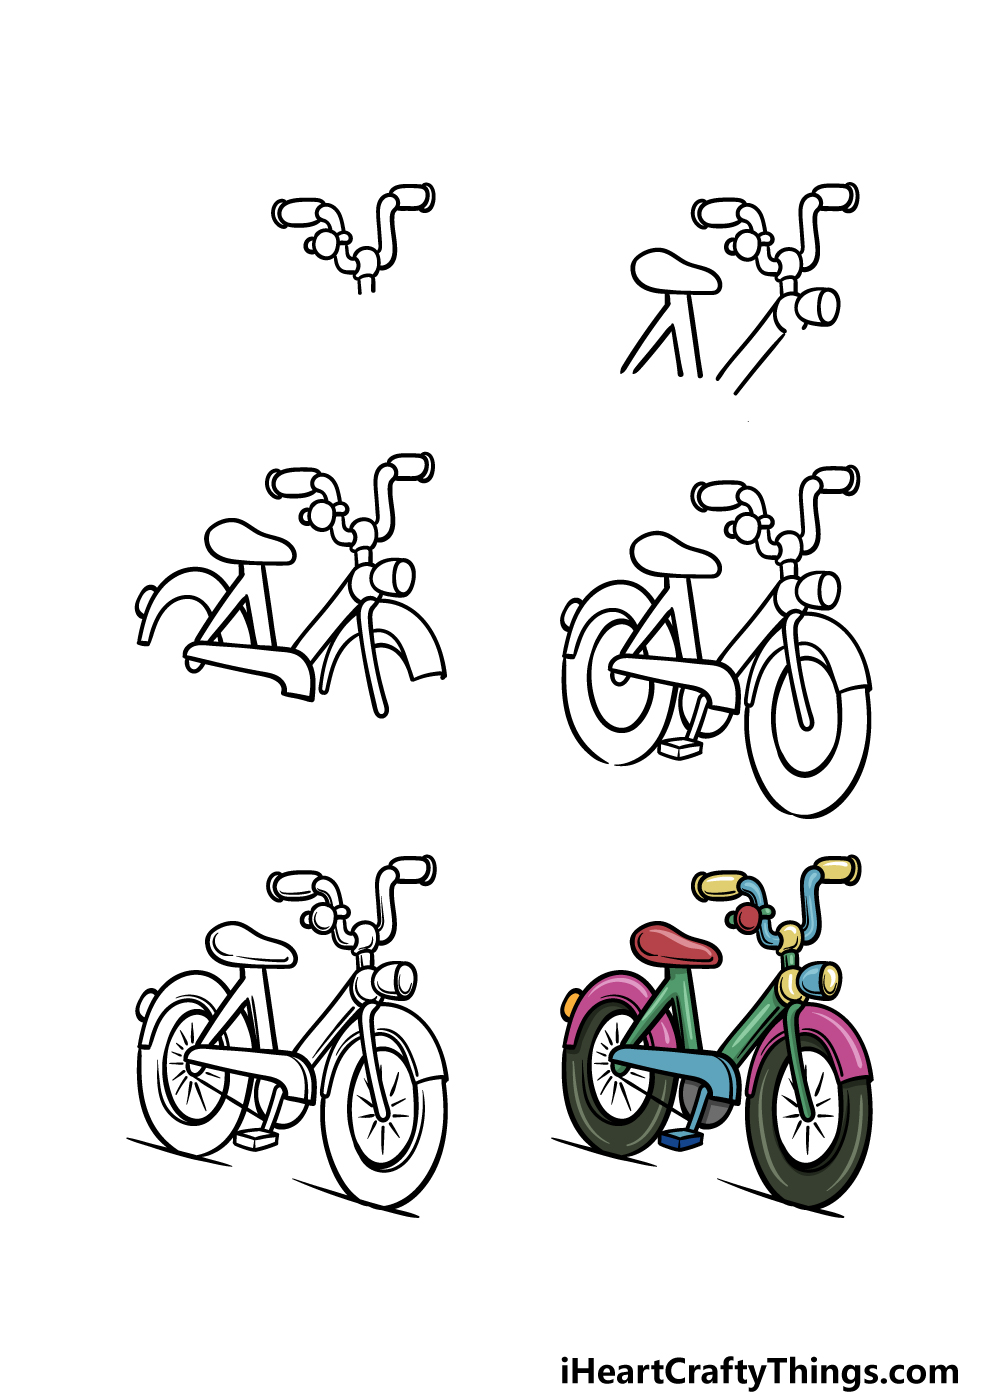
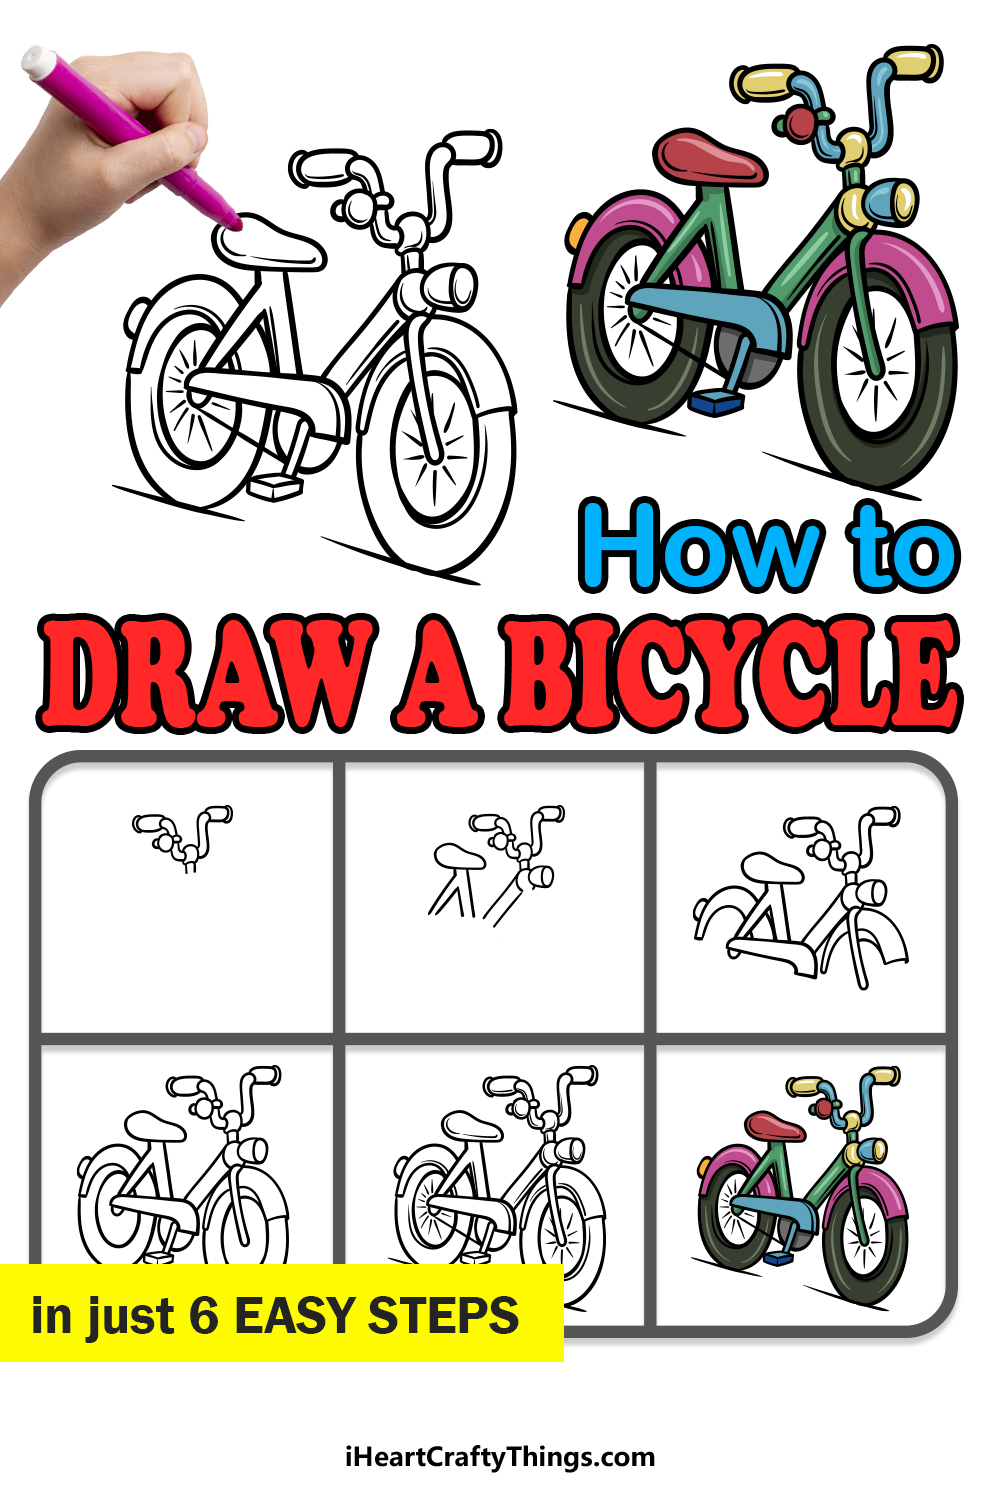
What's in this Weblog Post
- How to Depict A Wheel – Allow'south Become Started!
- Stride 1
- Step two – Now, get-go drawing the body of the bicycle
- Step 3 – Depict the covers for the wheels in this step
- Stride 4 – Next, draw the wheels and pedals
- Footstep five – Add the final details to your bicycle cartoon
- Step 6 – Finish off your bike drawing with color
- Your Bike Drawing is Consummate!
How to Draw A Bike – Let's Become Started!
Step ane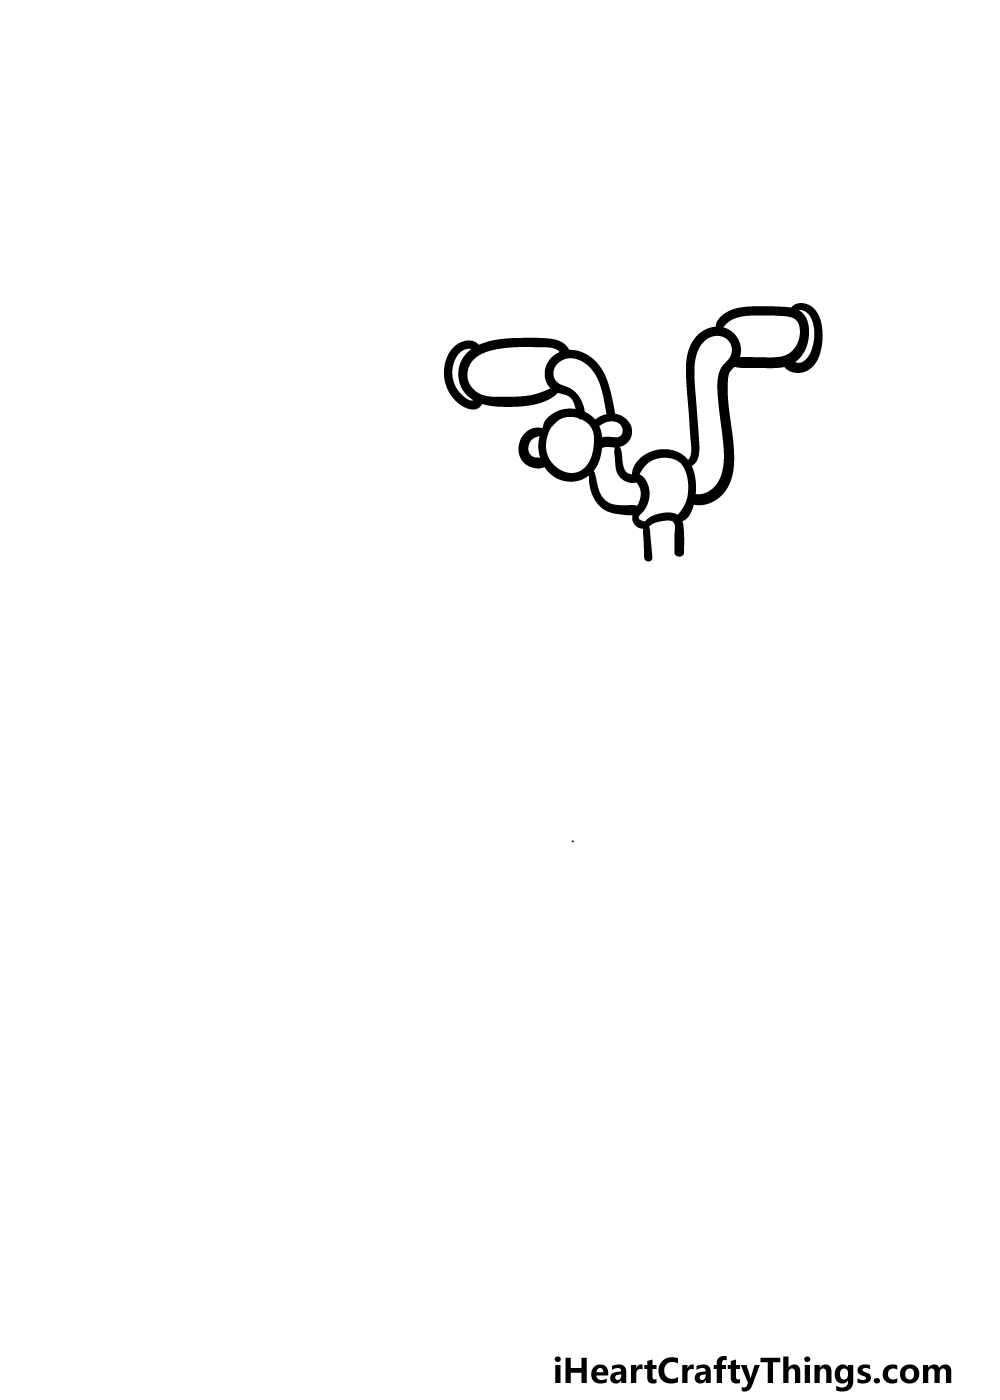
This guide on how to describe a bicycle will begin with the handlebars of the bike. Draw a rounded shape for the section that both sides of the handlebars will come out of.
Then, you can employ some curved lines for the bars extending upward. On the left, draw a minor circular shape clipped onto the bar for a bicycle bell.
Then, nosotros volition be drawing the handle grips. These tin be drawn using some long, flat rounded shapes at the ends of the bars.
Finally, extend some small lines down from the department belongings the handlebars, and and so you volition exist set for the second step of the guide!
Stride 2 – Now, start drawing the torso of the wheel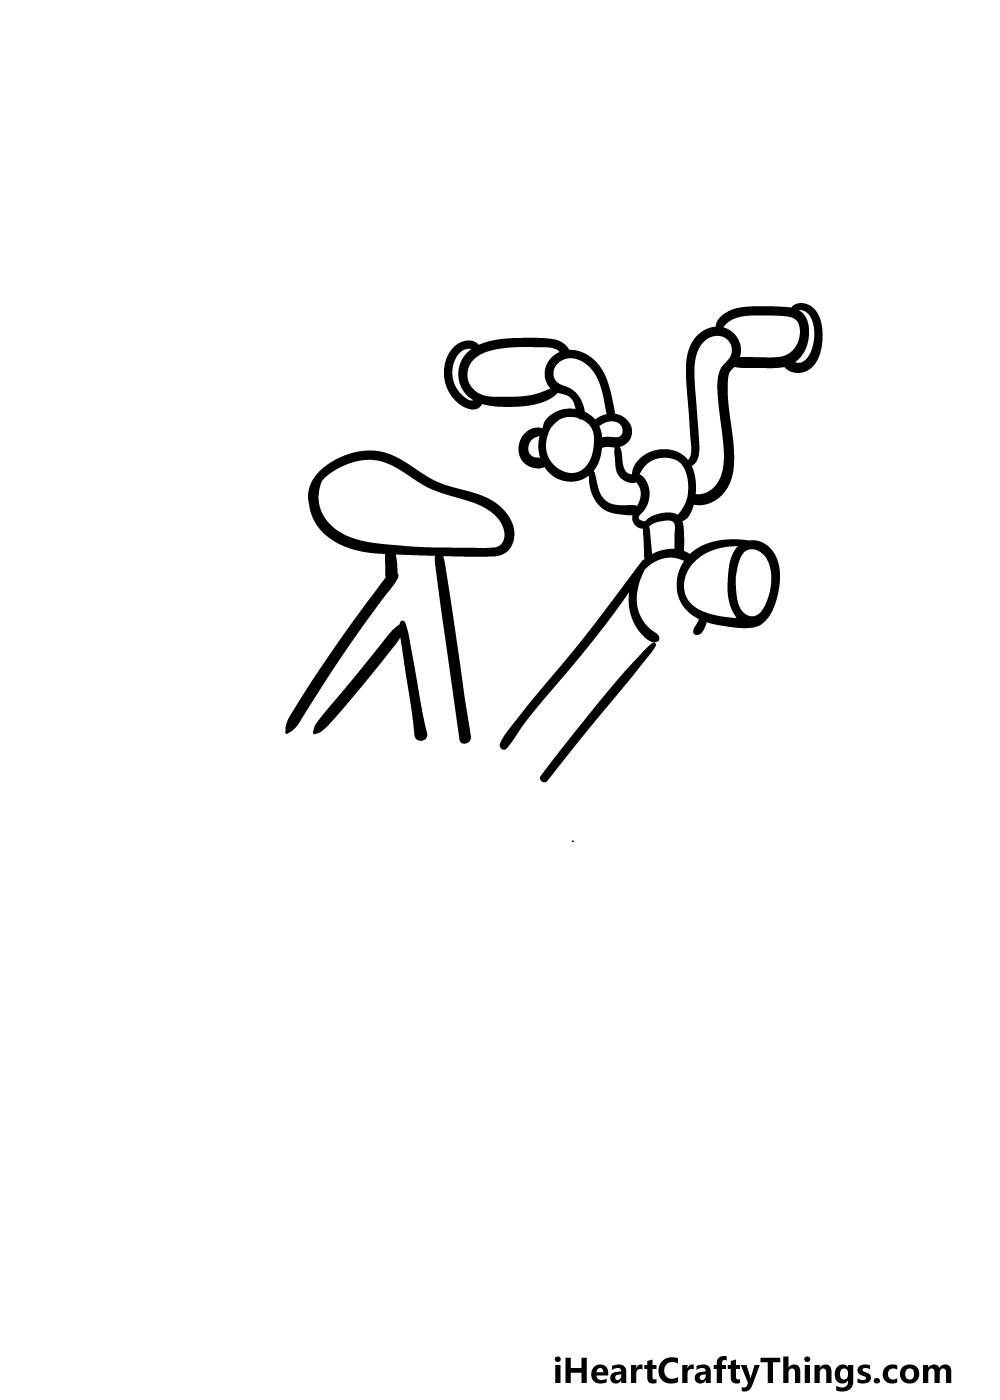
Yous take the handlebars done, and in this second part of your bicycle cartoon we shall first working on the body of the bicycle.
Offset, describe a small rounded shape with an oval at the forepart of information technology below where the handlebars concluded.
This will function as a pocket-sized light at the front end of the wheel. This light will be attached to a pocket-size rounded shape, and and then two direct diagonal lines will attach to that.
And then, yous will exist drawing the seat of the bike. The placement of this will be fairly important later, so try your best to position it every bit we did in our reference image.
Nosotros will finish off this step by drawing some more than directly lines extending from the seat for some more confined. Then it will exist time for step iii of the guide!
Step three – Draw the covers for the wheels in this step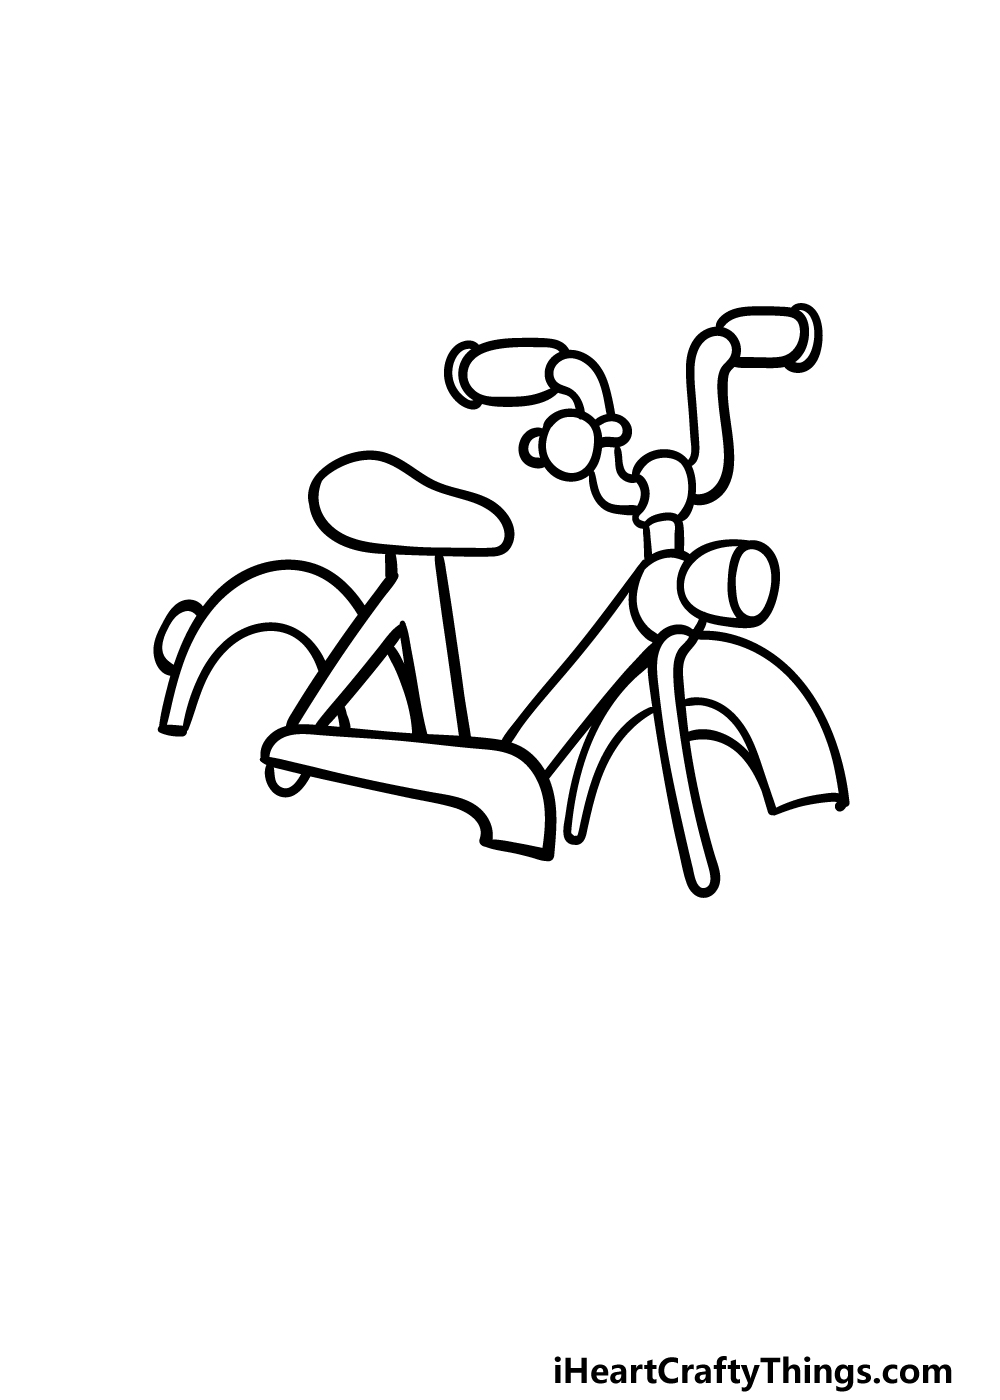
This 3rd step of our guide on how to draw a bicycle will exist about drawing some more sections of the bicycle.
Starting time, use some curved lines to create the sparse, rounded shapes that volition serve every bit the covers over the tops of the wheels. And so, there will be some other flat shape over where the concatenation of the bicycle will be.
Finish off by drawing another long, sparse curved shape extending down from underneath the bell that will connect to the eye of the front wheel.
Once you have it looking every bit information technology does in our reference film, we will be moving on to step 4.
Step iv – Side by side, describe the wheels and pedals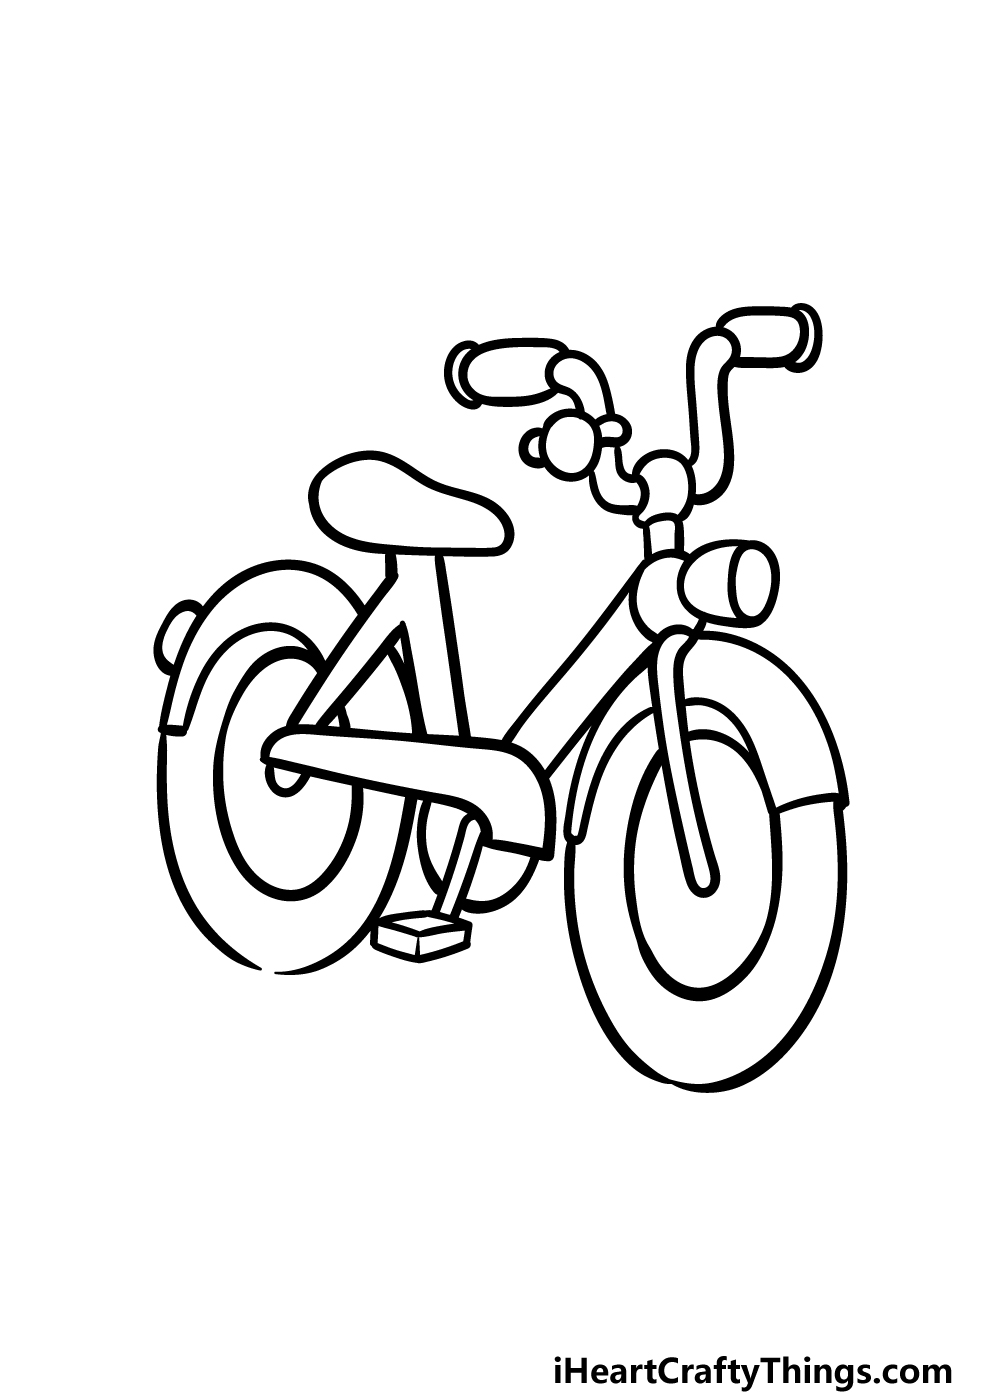
Information technology's almost time to start adding the final details and elements of this bicycle cartoon, but kickoff nosotros have a few of import parts to add.
It wouldn't be much of a bike without some wheels, and so we had better add together some of those now!
Y'all can draw these by adding two circles to the front end and back of the bike and then by drawing a smaller circle within each one.
Finish off by drawing the pedals of the bike attached to a round shape, and and so you can go along to those final details in the adjacent step.
Pace 5 – Add the final details to your bicycle drawing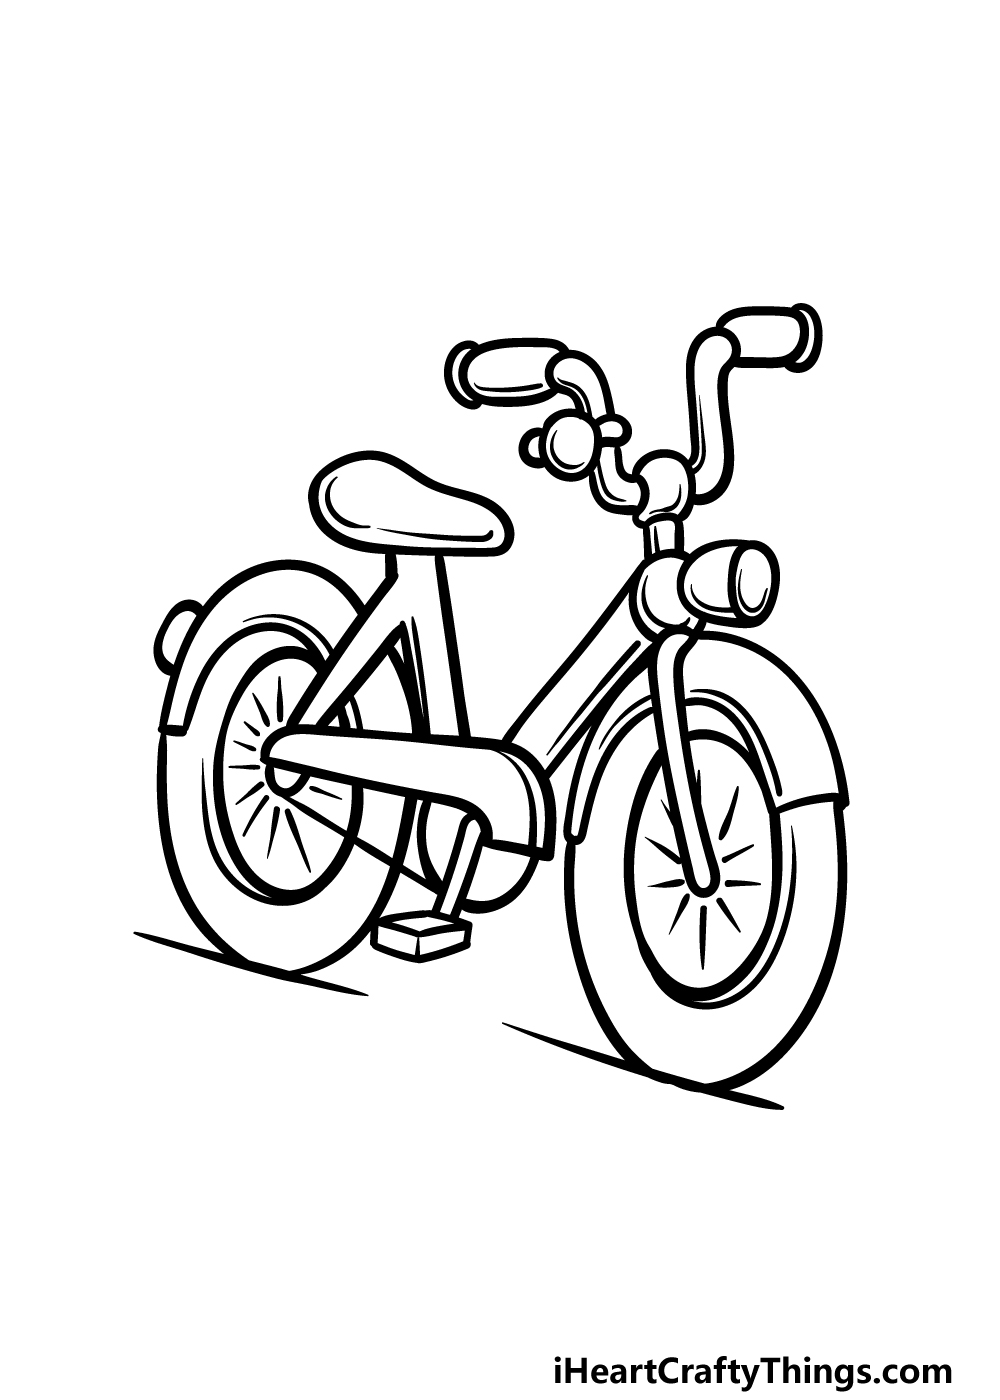
You've finished the outline for this moving-picture show, and at present you lot can make it await even improve by adding some final details and elements!
As shown in our reference epitome, we added some line details all throughout the paradigm.
These help to bear witness off the metallic textures of the bike trunk, and by adding lines into the wheel interiors y'all can portray the spokes of the wheels.
Finish off by drawing some horizontal straight lines for the footing this bicycle is on, and and then you're set for the final pace!
Before you go along, you lot could also add any other ideas you may take. These could include a creative background, some fun accessories for the bike or fifty-fifty someone riding it!
These are a few ideas, but what else can you think of to finish it off?
Step 6 – Finish off your bicycle drawing with color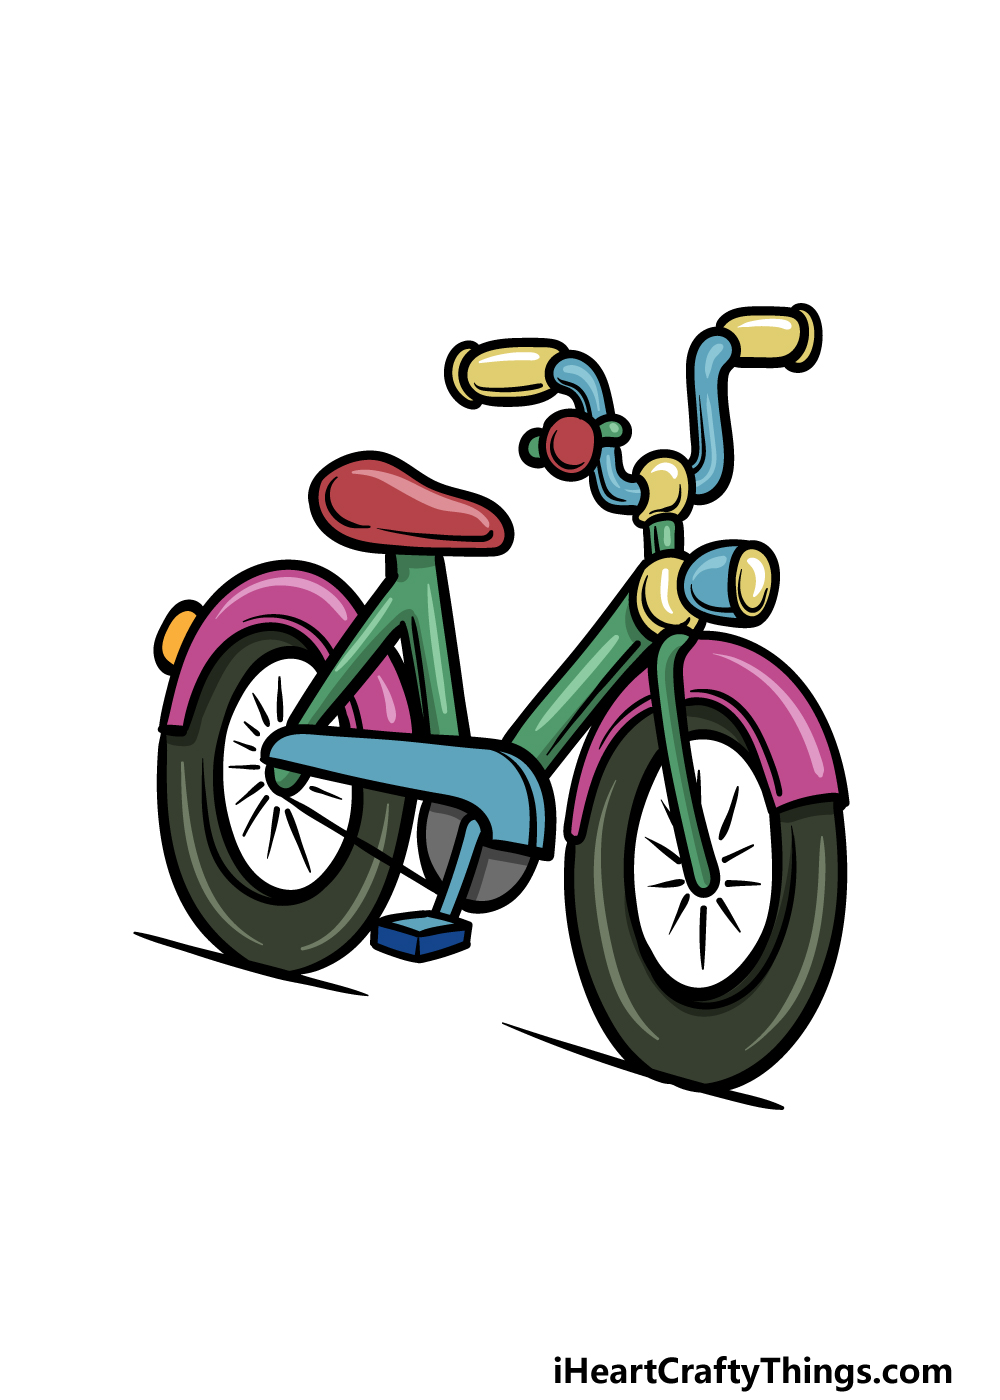
Yous've done an incredible job working on this bicycle drawing, and now y'all can have some fun finishing information technology off with some colors!
When it comes to colors, you'll find that bicycles tin can come up in pretty much any colors you tin imagine.
This gives yous a lot of freedom with how you could go about coloring it in. In our reference image, nosotros wanted the bicycle to be bright and colorful, so we used different cheerful shades for the various sections of the bike.
This is an arroyo that you could have every bit well, just you should definitely experience free to apply any colors you like.
When finishing this drawing, you take the perfect opportunity to experiment with your favorite colors and art mediums, and so have fun getting creative and run into what happens!
Your Bicycle Drawing is Complete!
The cycle has such a specific blueprint, and that tin can sometimes make drawing one a frustrating and unpleasant feel.
Hopefully with the assist of this guide on how to depict a bicycle you lot found it to be easy and fun to master!
Making this drawing easier was just role of our goal, every bit we also wanted to brand certain that at that place would be enough of room for your ain creativity.
At present that you lot have finished the guide, you lot can end it off with your own ideas and extras!
This guide yous have only completed is one of many that we have waiting for yous on our website!
You lot can visit us there to sample more astonishing guides, and you'll want to proceed checking in equally we have many more than coming out before long!
When your wheel drawing is all done, you can share your artwork on our Facebook and Pinterest pages to show information technology off!